In this guide, we’ll cover everything you need to know about installing, connecting, and setting up your Delvotest® Accelerator Smart (DAS) for the first time. Whether you're setting up one DAS or multiple devices, these steps will ensure a smooth installation process. In this article, we will cover the following topics:
- Installation
- Connecting to your computer
- Log in
- Overview page for multiple devices
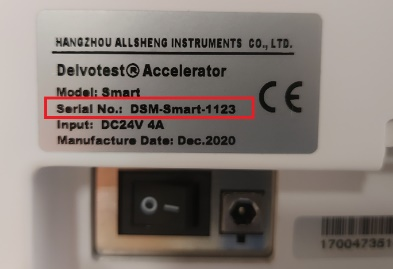
[[[ // very first thing here needs to be about explaining that their device has a serial number, and where they can find it ]] " (found on the back panel, pictured below)."
1. Installation
To install your DAS, follow the steps below. Make sure you have the necessary materials: DAS unit, power supply, Ethernet (blue) LAN cable, PC/laptop with Chrome browser, Colourcard, and optionally a router.
Step 1: Connect the DAS to the Power Supply
Plug the DAS into the power supply (110-220V).
Step 2a: Connecting One DAS to a PC
Connect the DAS to a PC via an Ethernet cable. Insert one end into the Ethernet port at the back of the DAS, and the other into the LAN port of your PC.
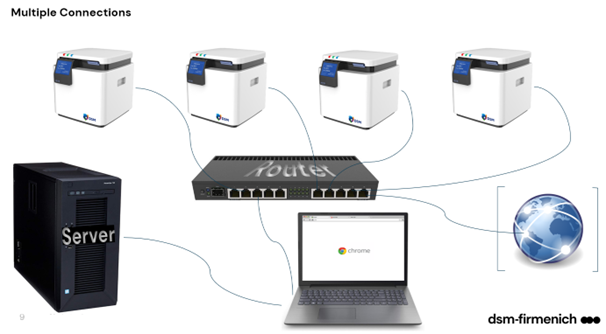
Step 2b: Connecting Multiple DAS Devices to a PC (Using a Wi-Fi Router)
Connect each DAS to the router using individual Ethernet cables. Connect the router to the PC or laptop with a LAN cable.
Step 3: Wait for the IP Address
Wait approximately 60 seconds for the IP address to display on the DAS screen. If necessary, restart the DAS.
Example: IP address 192.168.100.100
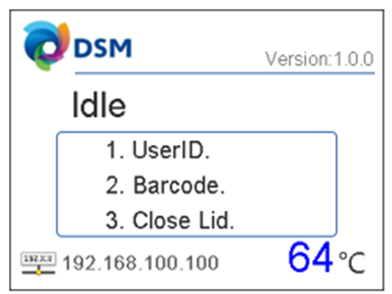
The IP address is automatically assigned by the DHCP server from your switch or router. This IP may change over time, but typically, the device will retain the same address.
Step 4: Access the DAS via Chrome
Open the Chrome browser on your PC and type the IP address into the search bar. The DAS Prepare screen will appear, allowing you to set up your incubation parameters.
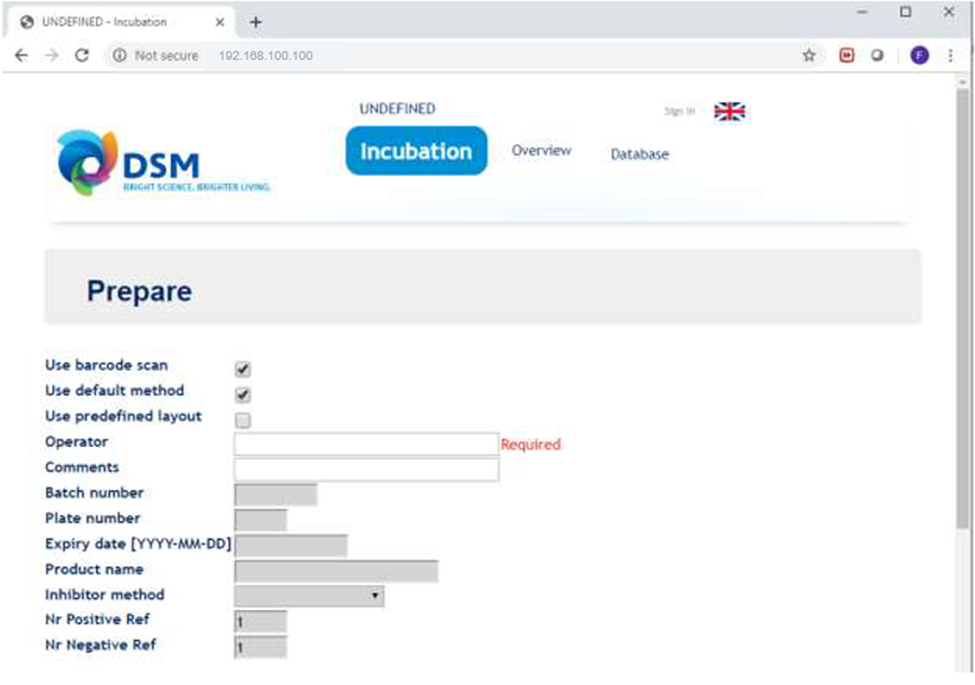
Step 5: Log in as Administrator
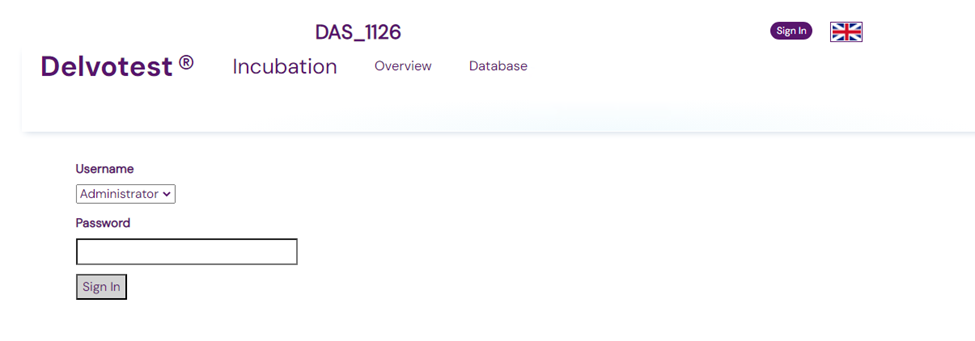
On the browser page, click on "Sign in" in the header, then log in under "Administrator" using the password Admin. Once signed in, the page will refresh, and additional options will appear.
Step 6: Customise Device Settings
[[ Under Setup, confirm that the Colourcard data file matches the card received. Proceed with the device calibrations (refer to the calibration guide for steps). ]] // Need to tighten this section — no need to cover the 'colourcard files' part here, we'll do that in the calibration article; what does need to be covered here somewhere is the 'check' if the date + time is correct.
2. Connecting to your computer
To connect the DAS to your computer, follow the appropriate steps based on whether you are connecting one or multiple devices.
Connecting One DAS to a PC:
- Connect the blue Ethernet cable from the DAS to the LAN port on your PC.
Connecting Multiple DAS Devices to a PC (Using a Router):
- Connect each DAS to the router using separate Ethernet cables.
- Connect the router to your PC/laptop via a LAN cable.
3.Log in
To access the DAS system, follow these steps:
- Open the browser and type the DAS IP address into the search bar.
- Click Sign in at the top of the screen.
- Select "Administrator" as the username, and enter the password Admin.
4. Overview page for multiple devices
If you're working with multiple DAS devices, you can view the current status of all devices on a single page.
Accessing the Overview Page
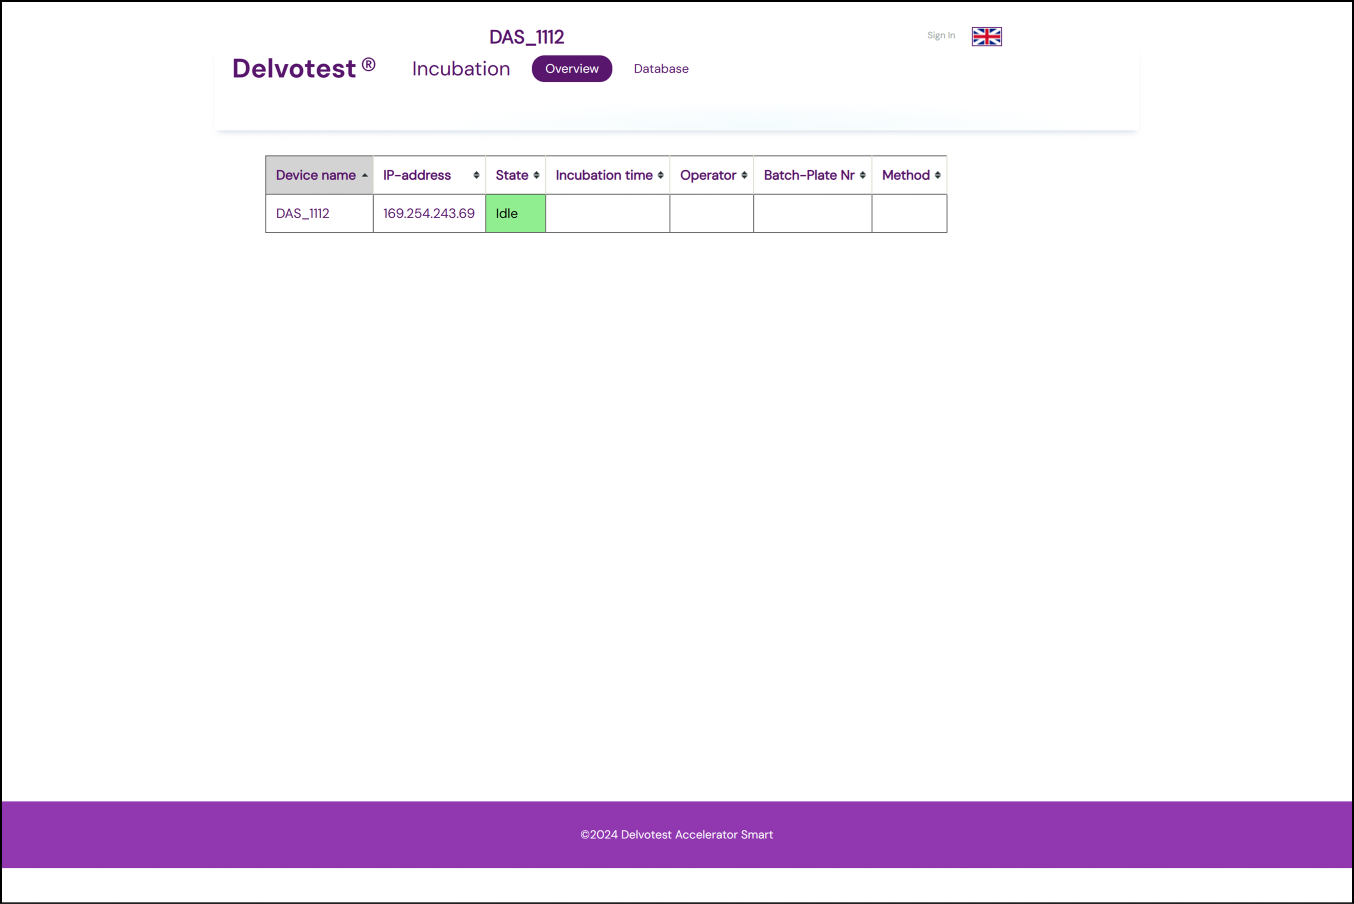
Click on the Overview tab in the header. The page will display the status of all connected DAS devices in the same network, updating automatically as the status of each device changes.
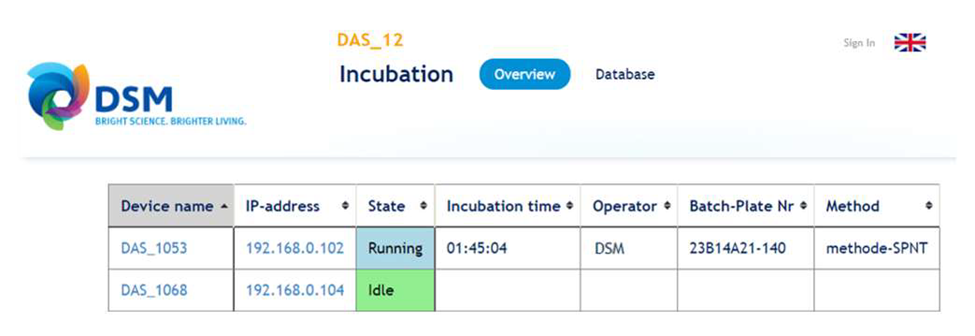
Each row represents a DAS device and includes a clickable link (device name and IP address). Clicking these links will take you directly to the incubation page of the selected DAS. You can open multiple incubation pages in new tabs by holding down the CTRL key while clicking.
DAS States
The overview page displays the status of each DAS using various states (Idle, Running, Error, etc.). Refer to the table below for descriptions of the possible states.
| State | Description |
| Idle | Ready for use, an incubation can be prepared |
| Waiting for barcode | Incubation run has been prepared and the device is waiting to scan a plate's barcode |
| Waiting to start | Waiting to start a new test. Operator must press 'Start' |
| Running | Running an incubation. Time elapsed is displayed and updated every minute |
| Finished | Incubation finished. Total time elapse is displayed. |
| Error | See 'Troubleshooting' for more information |
| Service mode | Used during calibrations |
Summary
Setting up your DAS system is a straightforward process that can be easily managed, whether you're connecting a single device or multiple units within a network. By following the steps outlined in this guide, you can ensure that your DAS is properly installed, connected to your computer, and ready to perform efficiently.
The DAS system provides flexibility with both single and multiple device configurations, allowing you to monitor and manage incubation processes seamlessly. With the ability to access the overview page, sign in as an administrator, and customize settings, you have full control over your devices and their performance.
For ongoing maintenance, remember to regularly check for software updates, and use the tools provided by the DAS system to ensure smooth operations across all devices. Should any issues arise, the DAS provides clear states and feedback to assist in troubleshooting and resolution.
By leveraging these features, your DAS system will continue to enhance your testing processes and improve the efficiency of your laboratory operations.
Next Steps
Now that your system is set up and ready to go, the next step is understanding the device's display and LED indicators (🔗).